Approval workflow
Submitting Data for Approval
Note
Please note, the approval workflow does not apply to the submission of verification and certification data. This is because both types of submissions do not require revalidation at each administrative level and will be directly saved as data points.
All data that is pending submission for approval will appear on the pending submission tab. Note that you will need to select different questionnaires to see pending submissions for each questionnaire. This is to avoid batching data from different questionnaires in one batch for approval which is not valid.

Next, select all the datasets you are submitting for approval by ticking the checkbox next to each data set then click the BATCH SELECTED DATASETS button.

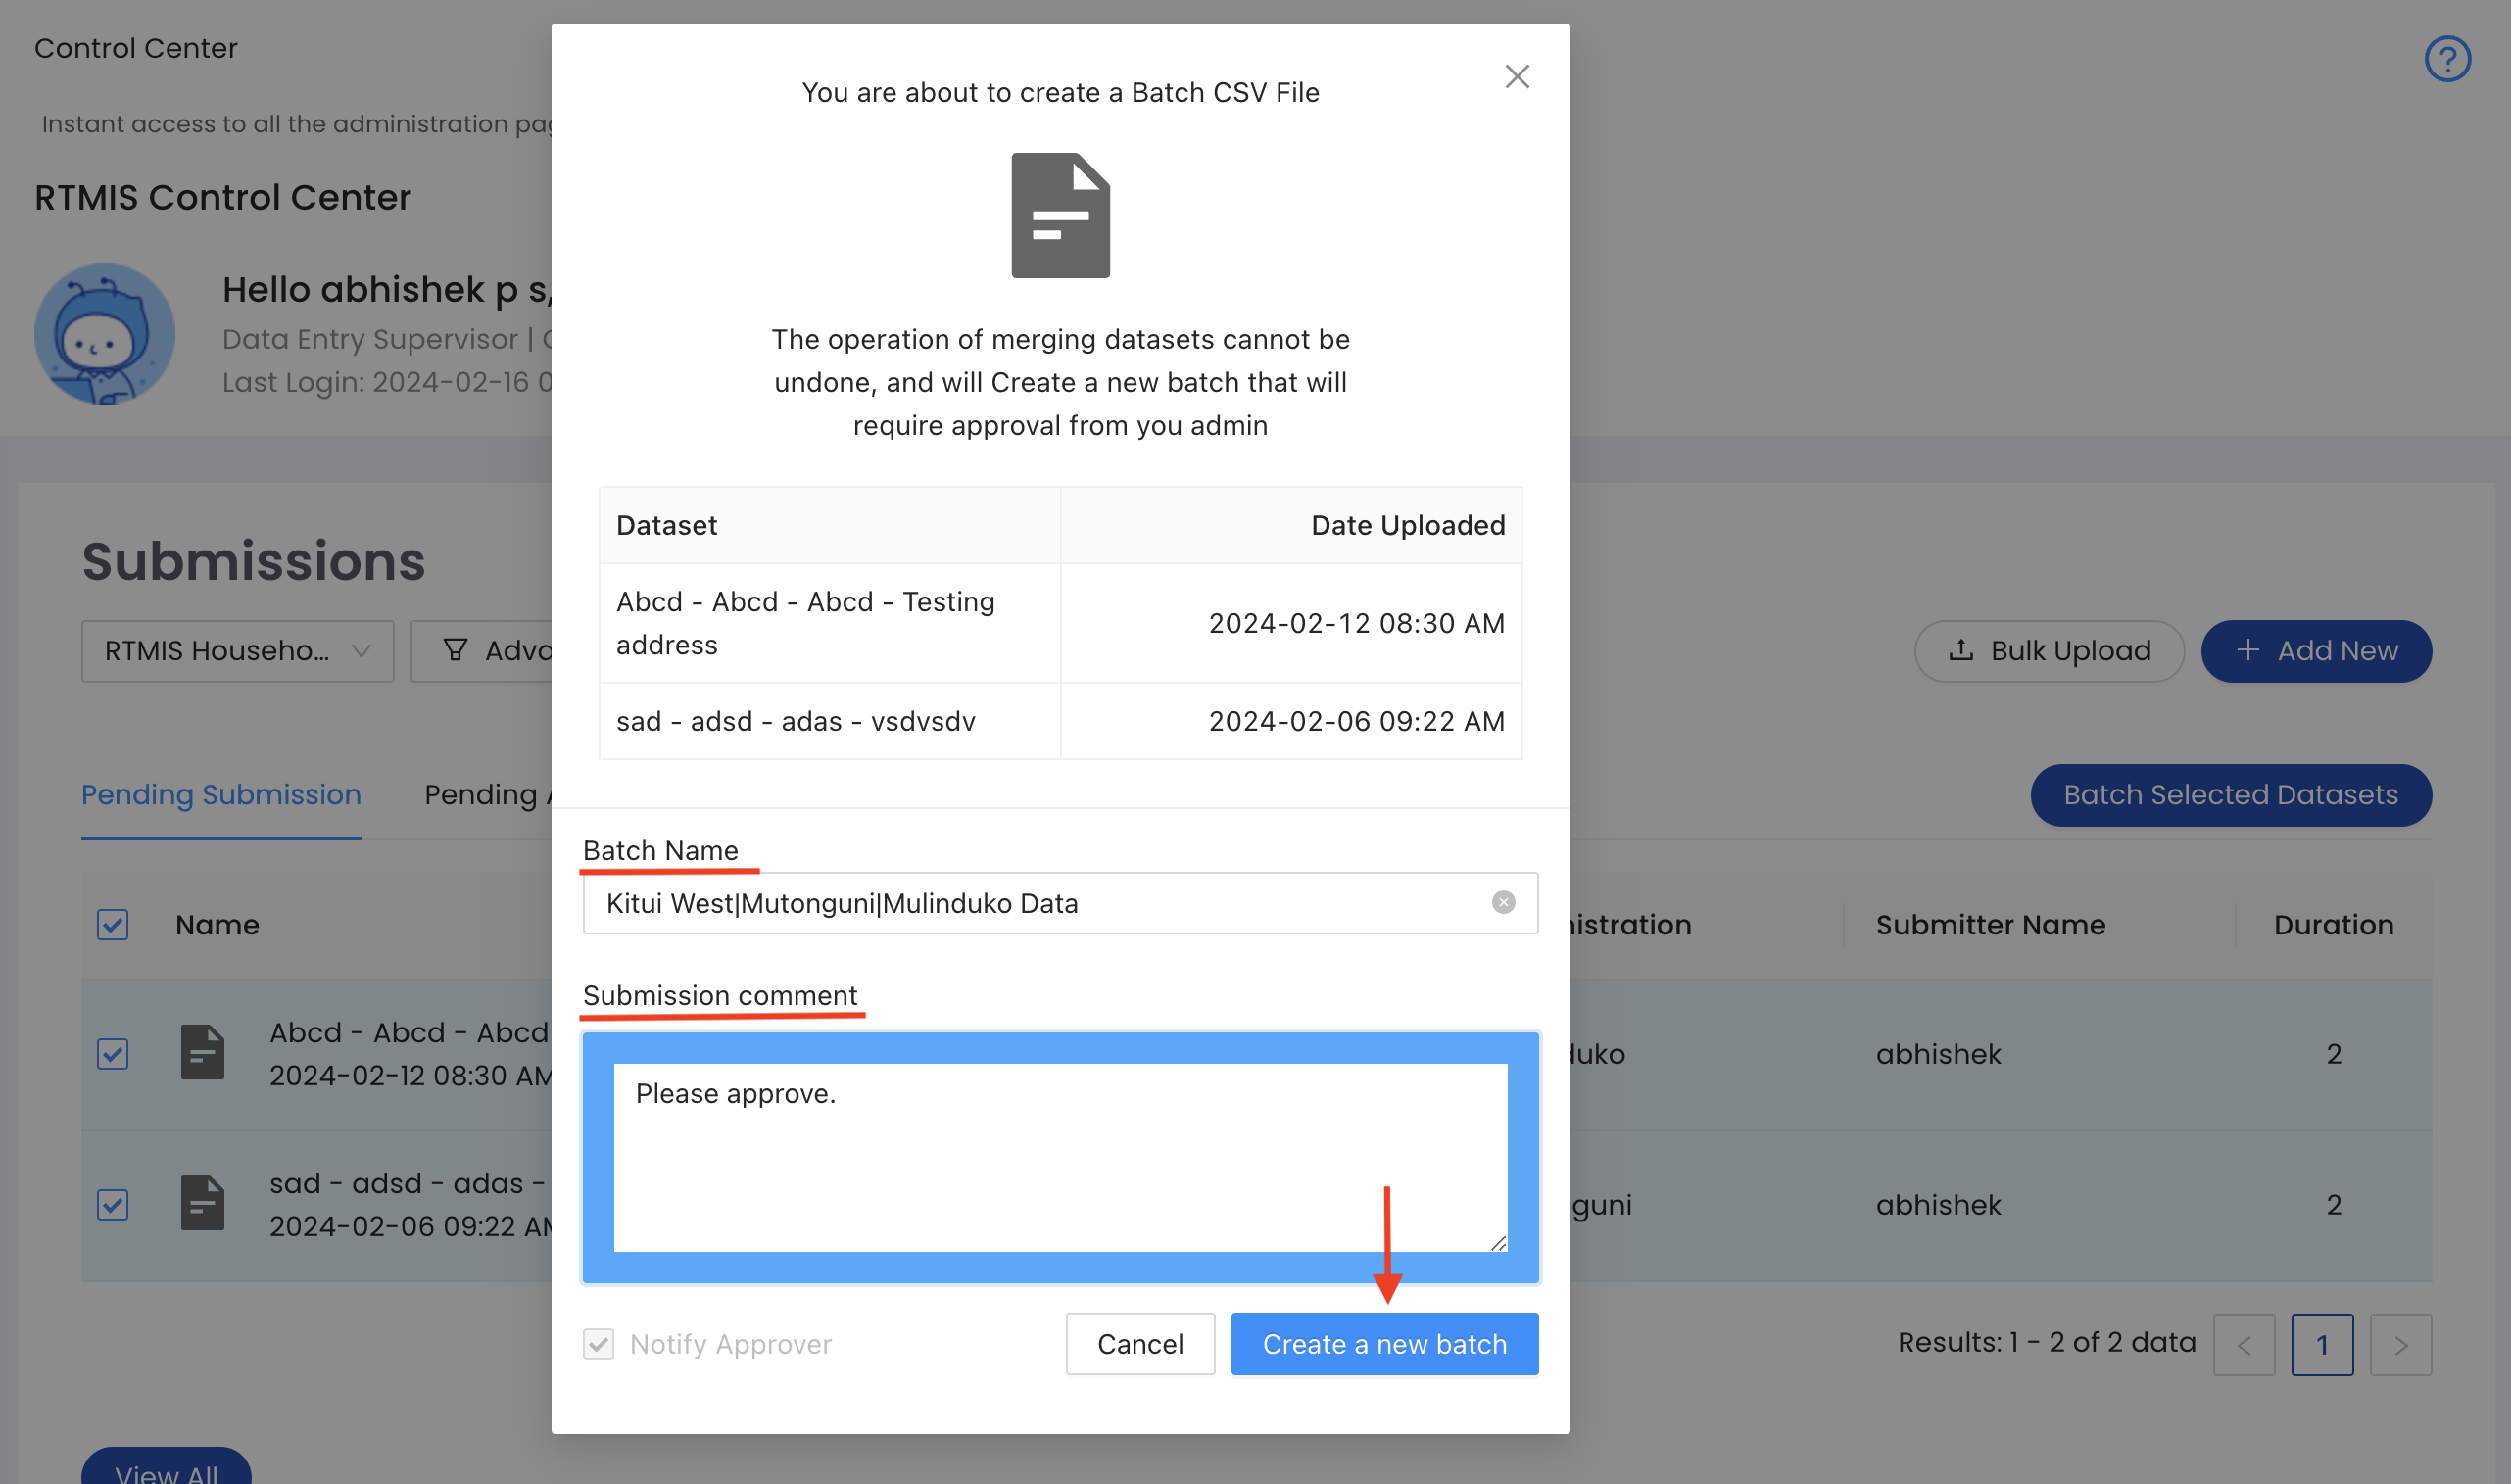
In the pop-up window, label your batch with a relevant name and add any comment for your approver. Next, click the CREATE A NEW BATCH button.
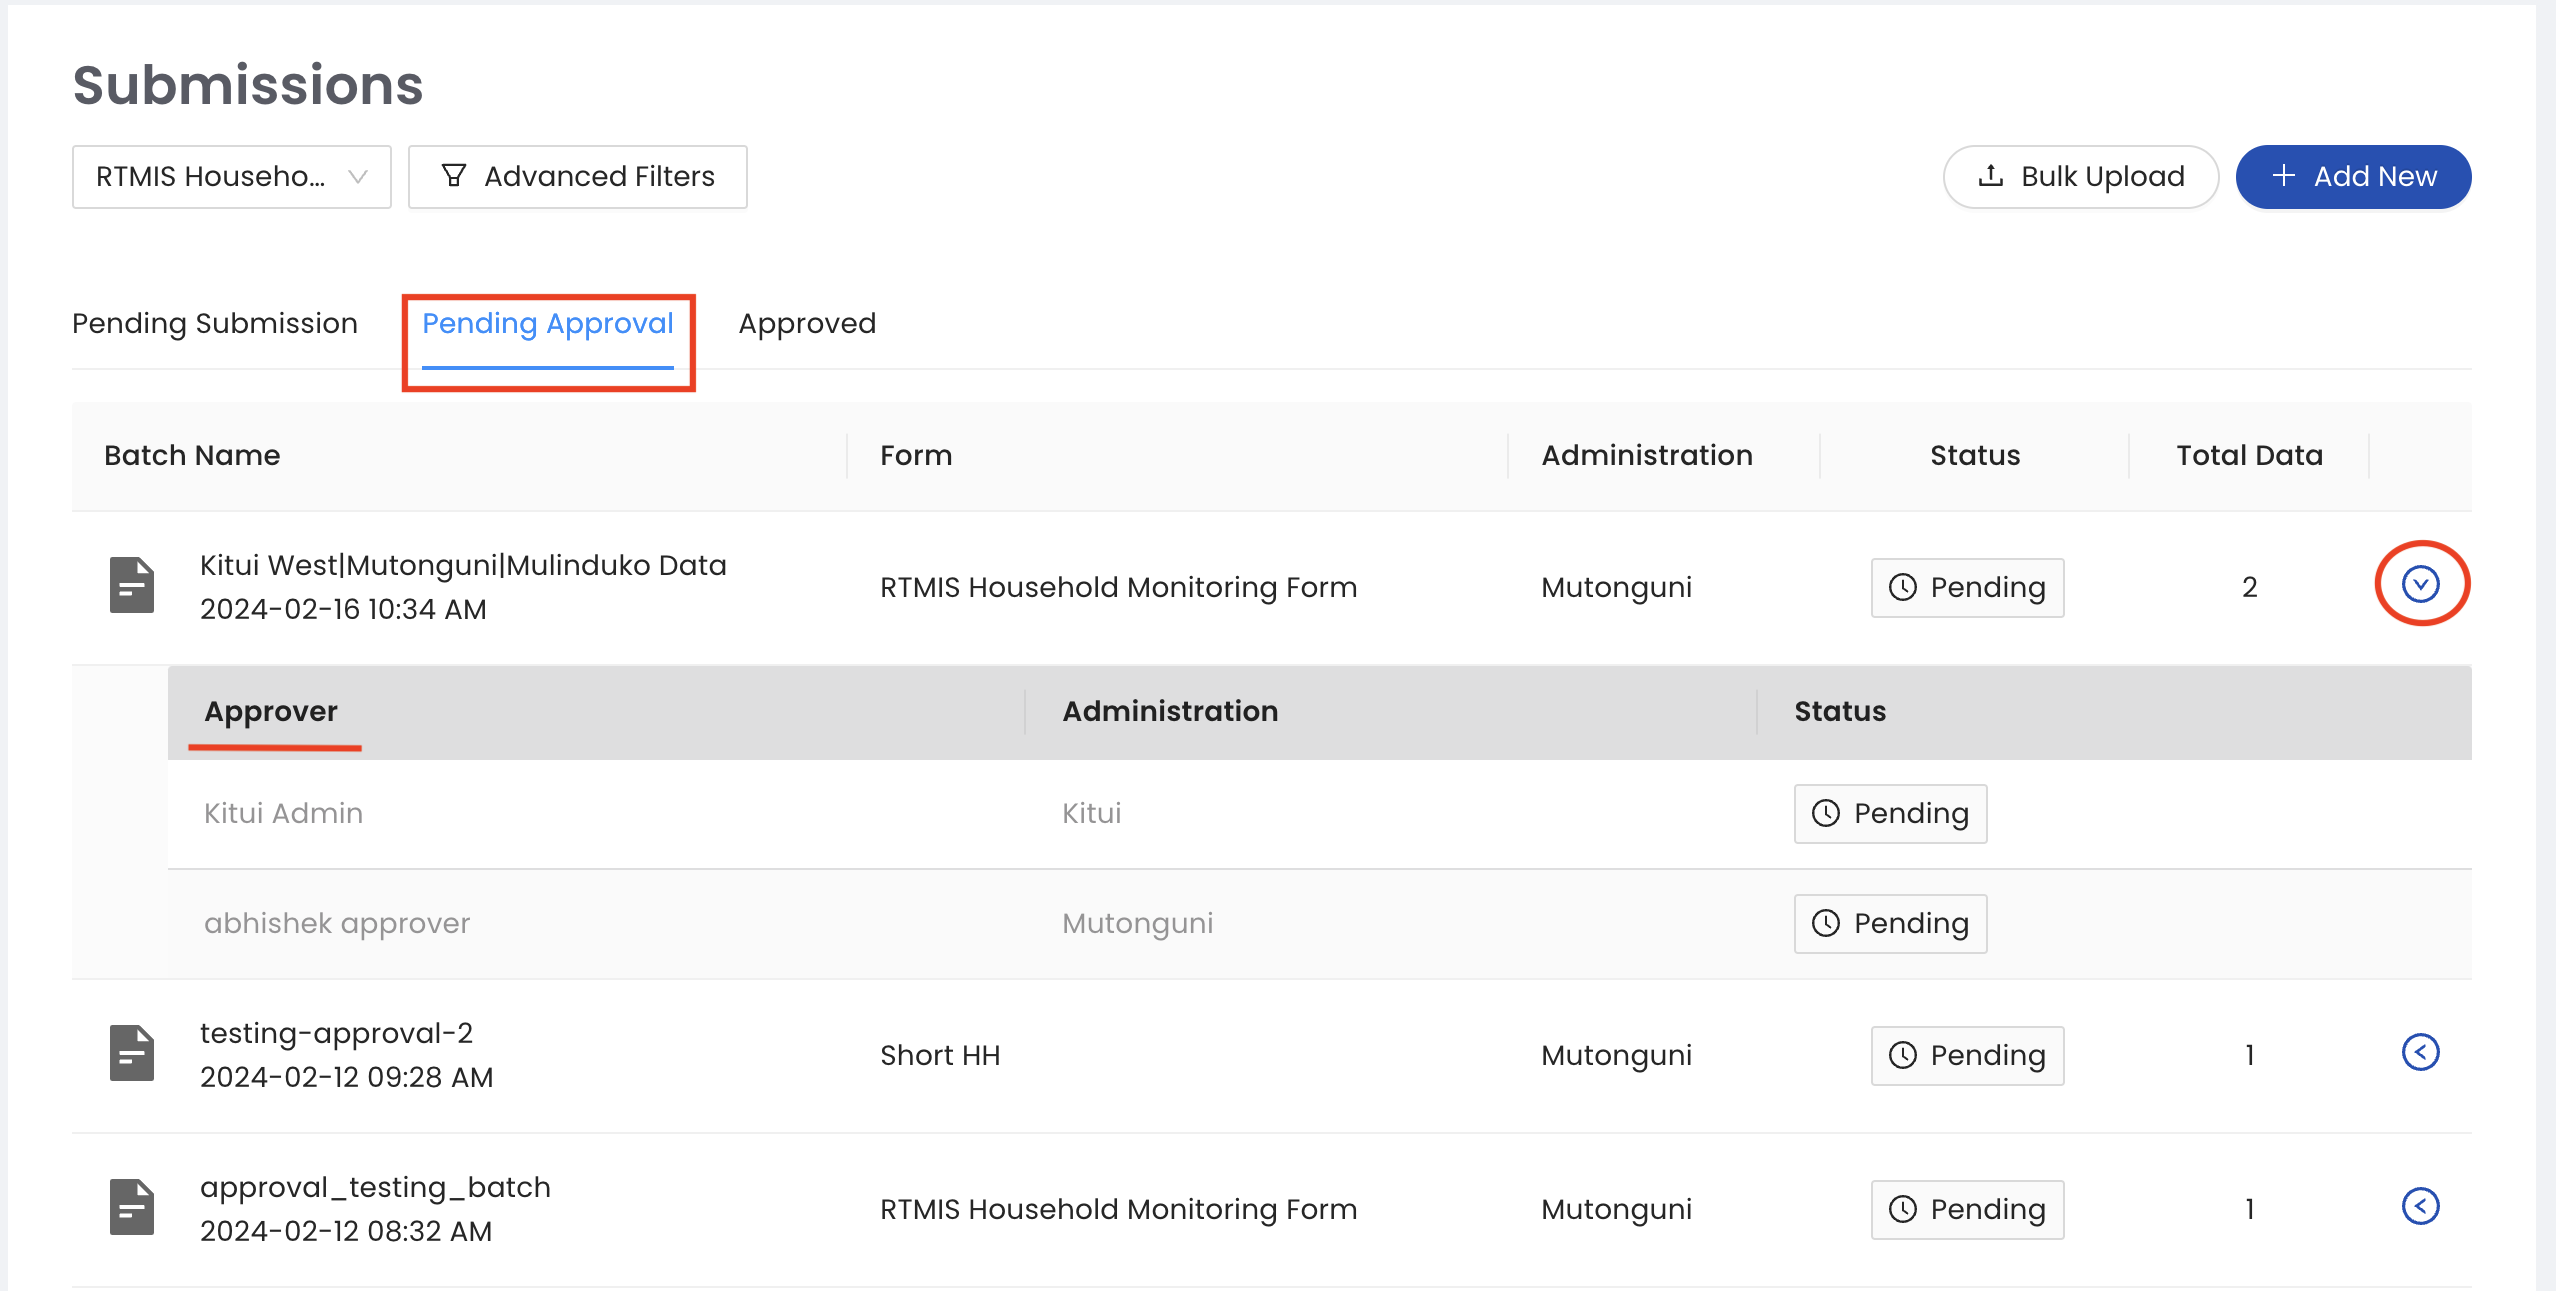
Your dataset is now submitted for approval and will appear in the pending approval tab. You can expand each data set to see your approver who will receive an email notification to approve your data.Notifications/Alerts
Approving Data
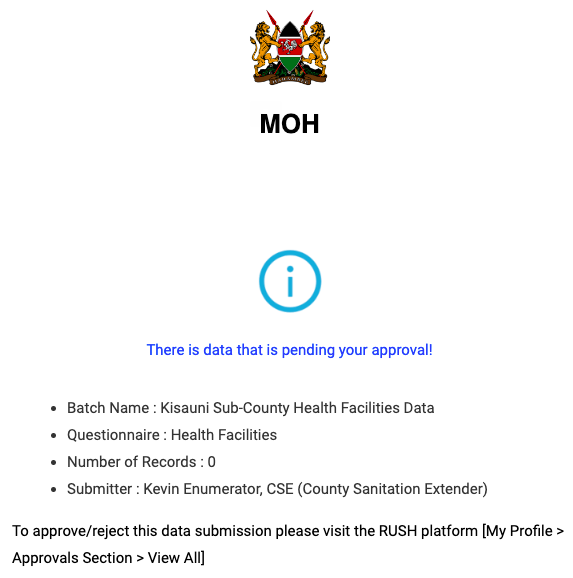
Data Approvers will receive an E-mail notification every time there is data that needs their approval within their assigned administrative region. Log in to approve the data.
All datasets that are pending approval will appear in the Verification section of the Control center. Click the View All button to begin the approval process.

3. To approve or decline a dataset, expand the toggle button next to each data set. Here we have two tabs: Data Summary: A quick snapshot of the data you are approving. Raw Data: From this tab, you can access the raw data, make edits and save edits. You can add notes and feedback and the data submitter will receive an email notification once the dataset is approved or declined.


Once the data is is approved it will move to the approved tab.

Note: Rejected datasets will appear in the My Pending Approvals tab with the status Rejected:bolditalic:. The status will change to Pending when the data submitter updates the rejected dataset as per the Approver’s instructions.
Handling Rejected Data
Rejected datasets will appear in the Pending Approval tab with the status Rejected:bolditalic:. Enumerators will receive an email notification when their data is rejected with an explanation from the approver why the data was rejected. Next, expand the toggle button next to the rejected dataset to make edits and resubmit your dataset.

From the Raw Data tab, make any edits as per your Approver’s instructions. You can reset to default values in case you make an error while editing. Finally, when you are done with all edits click the SAVE EDITS button. Your dataset will now appear under Pending Approval with the status Pending and your Approver will be able to review and approve again.
